


Reverse Balayage Tutorial: How To Easily Blend Dark Into Blonde
If you’re currently blonde and looking to add depth, dimension, or darken your overall hair color slightly, you’ve come to the right place! Reverse balayage is a phenomenal technique if your hair has become over-highlighted, you’re looking to grow out your natural color, or you just want to blend your roots into your ends a little better. So in this post I’ll cover what a reverse balayage is and exactly how to apply it to deepen your hair color.
I suggest reading through this post and then watching my YouTube video above to see exactly how I did this color on myself! I’m currently growing out my blonde, so this was the perfect technique for me to demonstrate.
What is a Reverse Balayage?
If you aren’t familiar with the term, reverse balayage is a hair coloring technique where darker hair color is painted onto the hair to create depth and dimension. It’s similar to lowlighting the hair, except it’s applied more similarly to balayage (hand-painted panels) than highlights (small sections in foils).
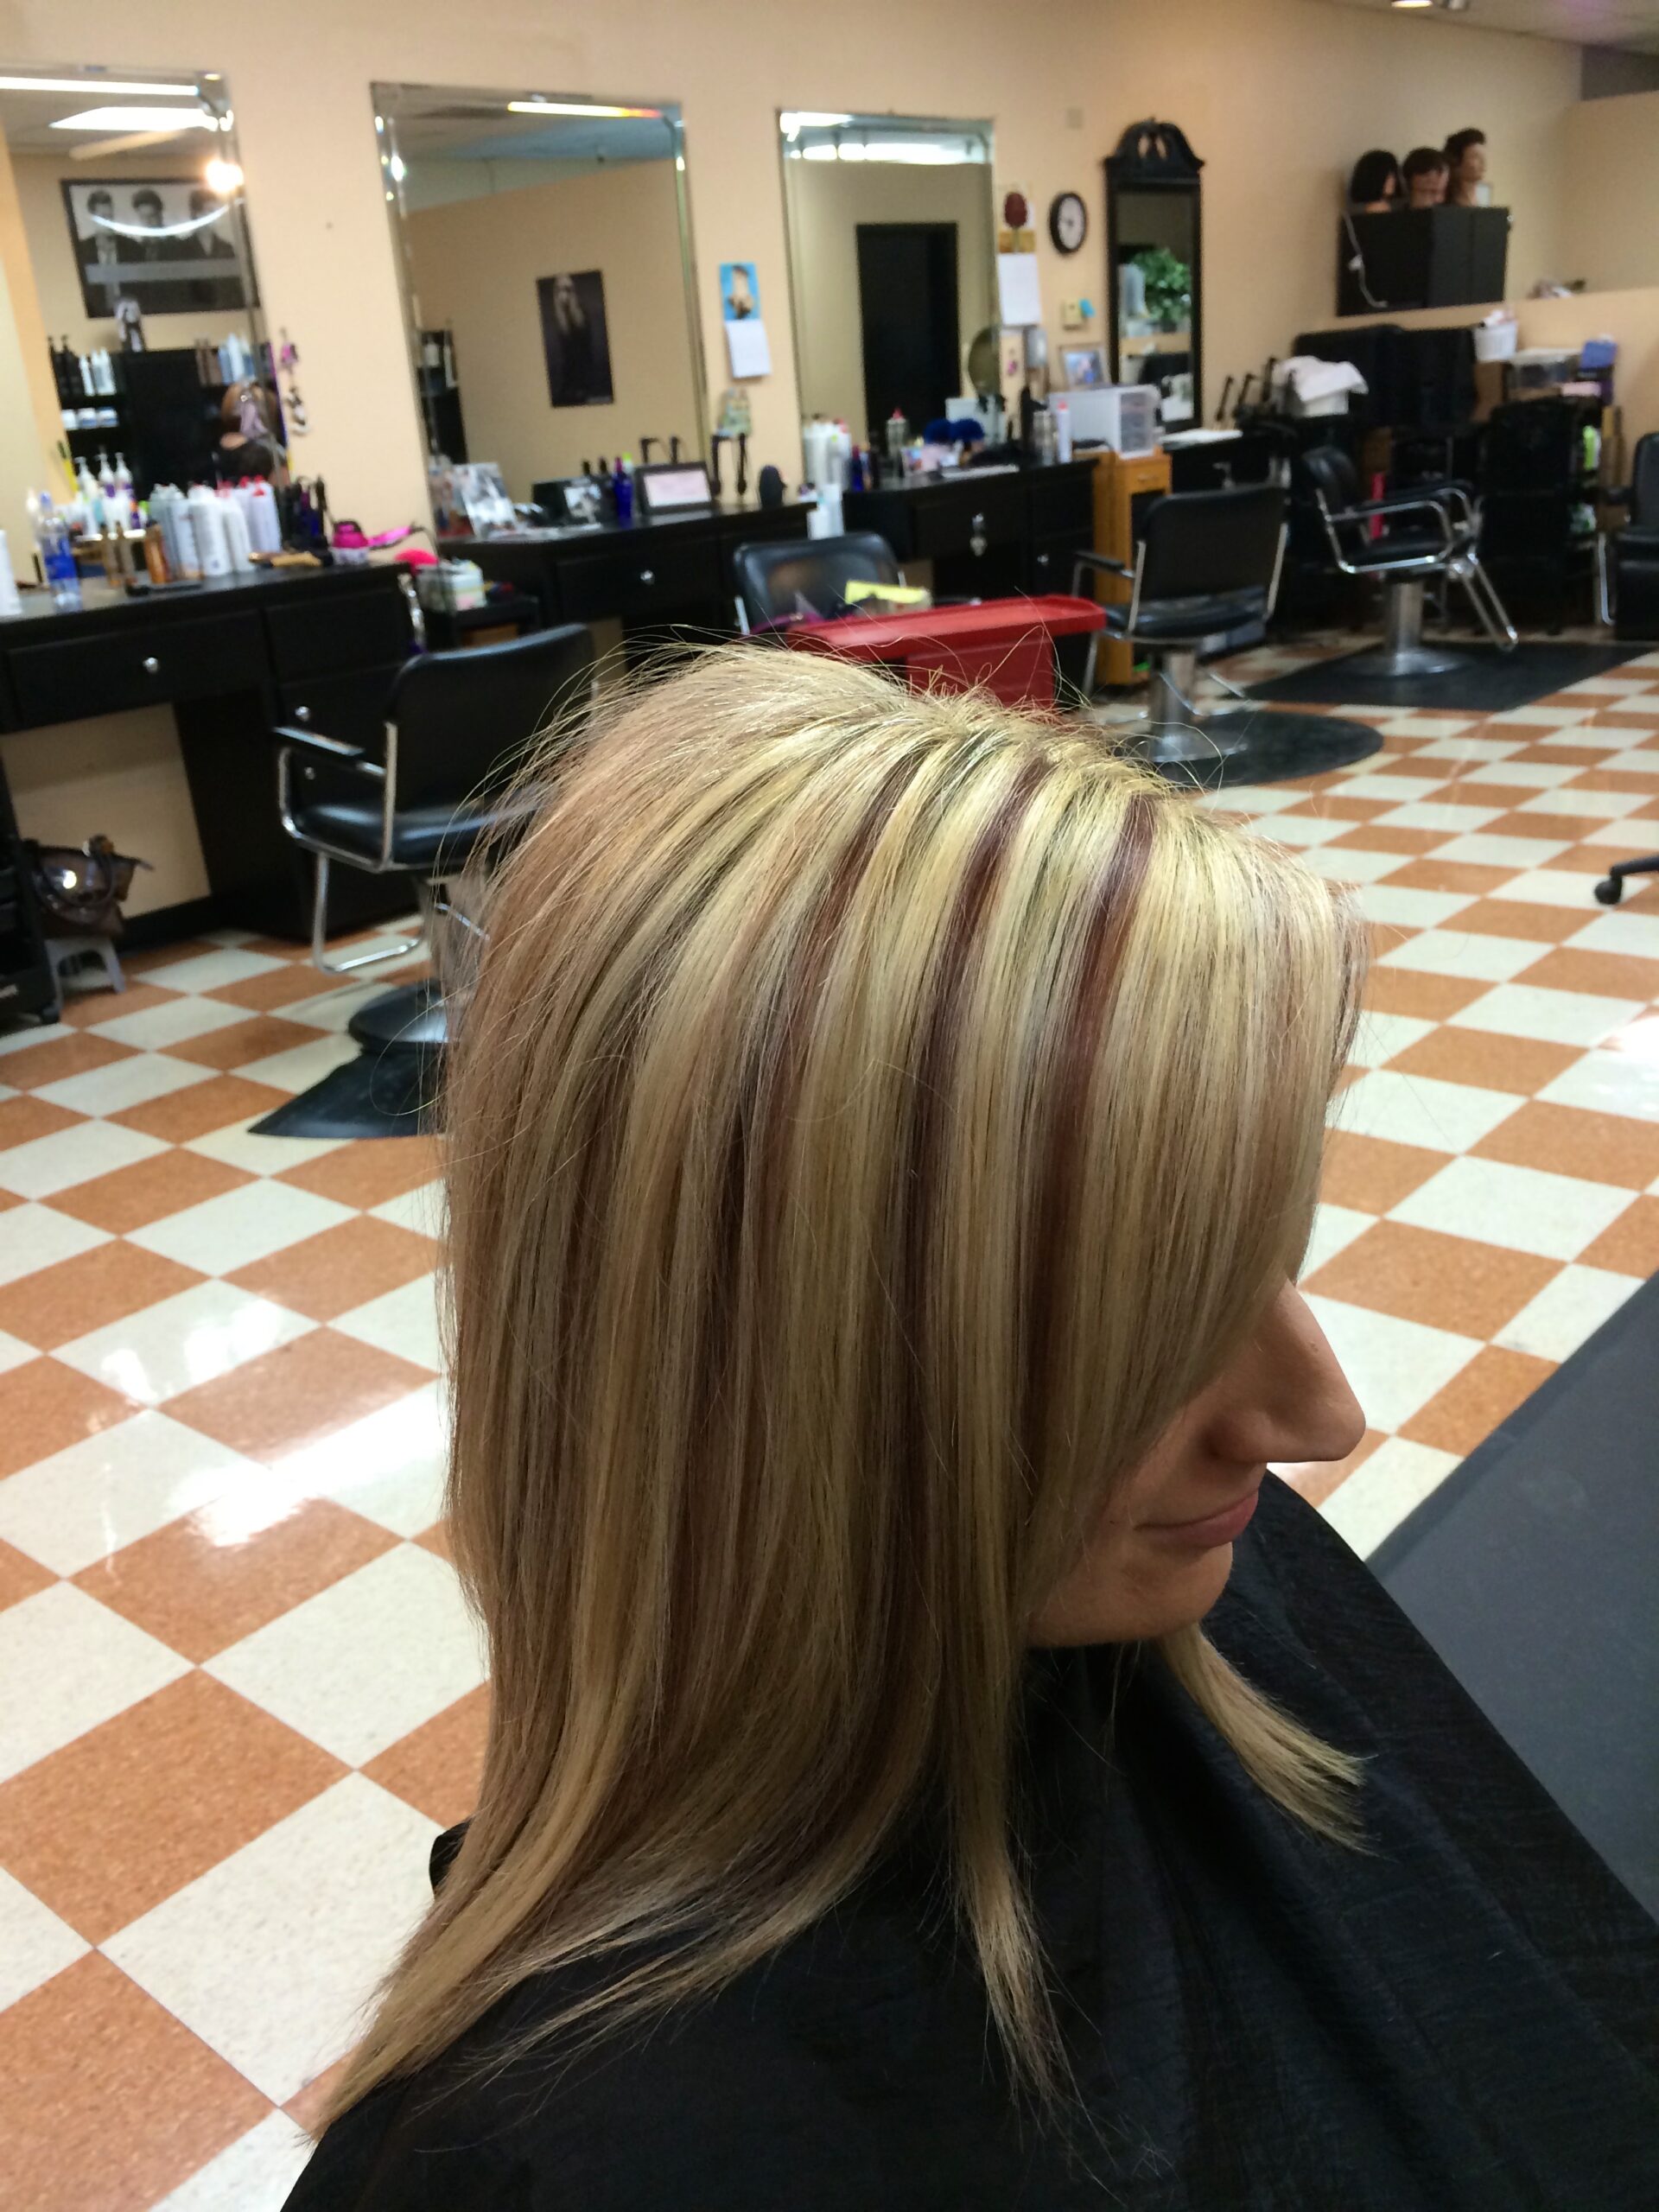
Lowlights have the tendency to look a little stripey sometimes, depending on the color and technique used to apply them (see image below).
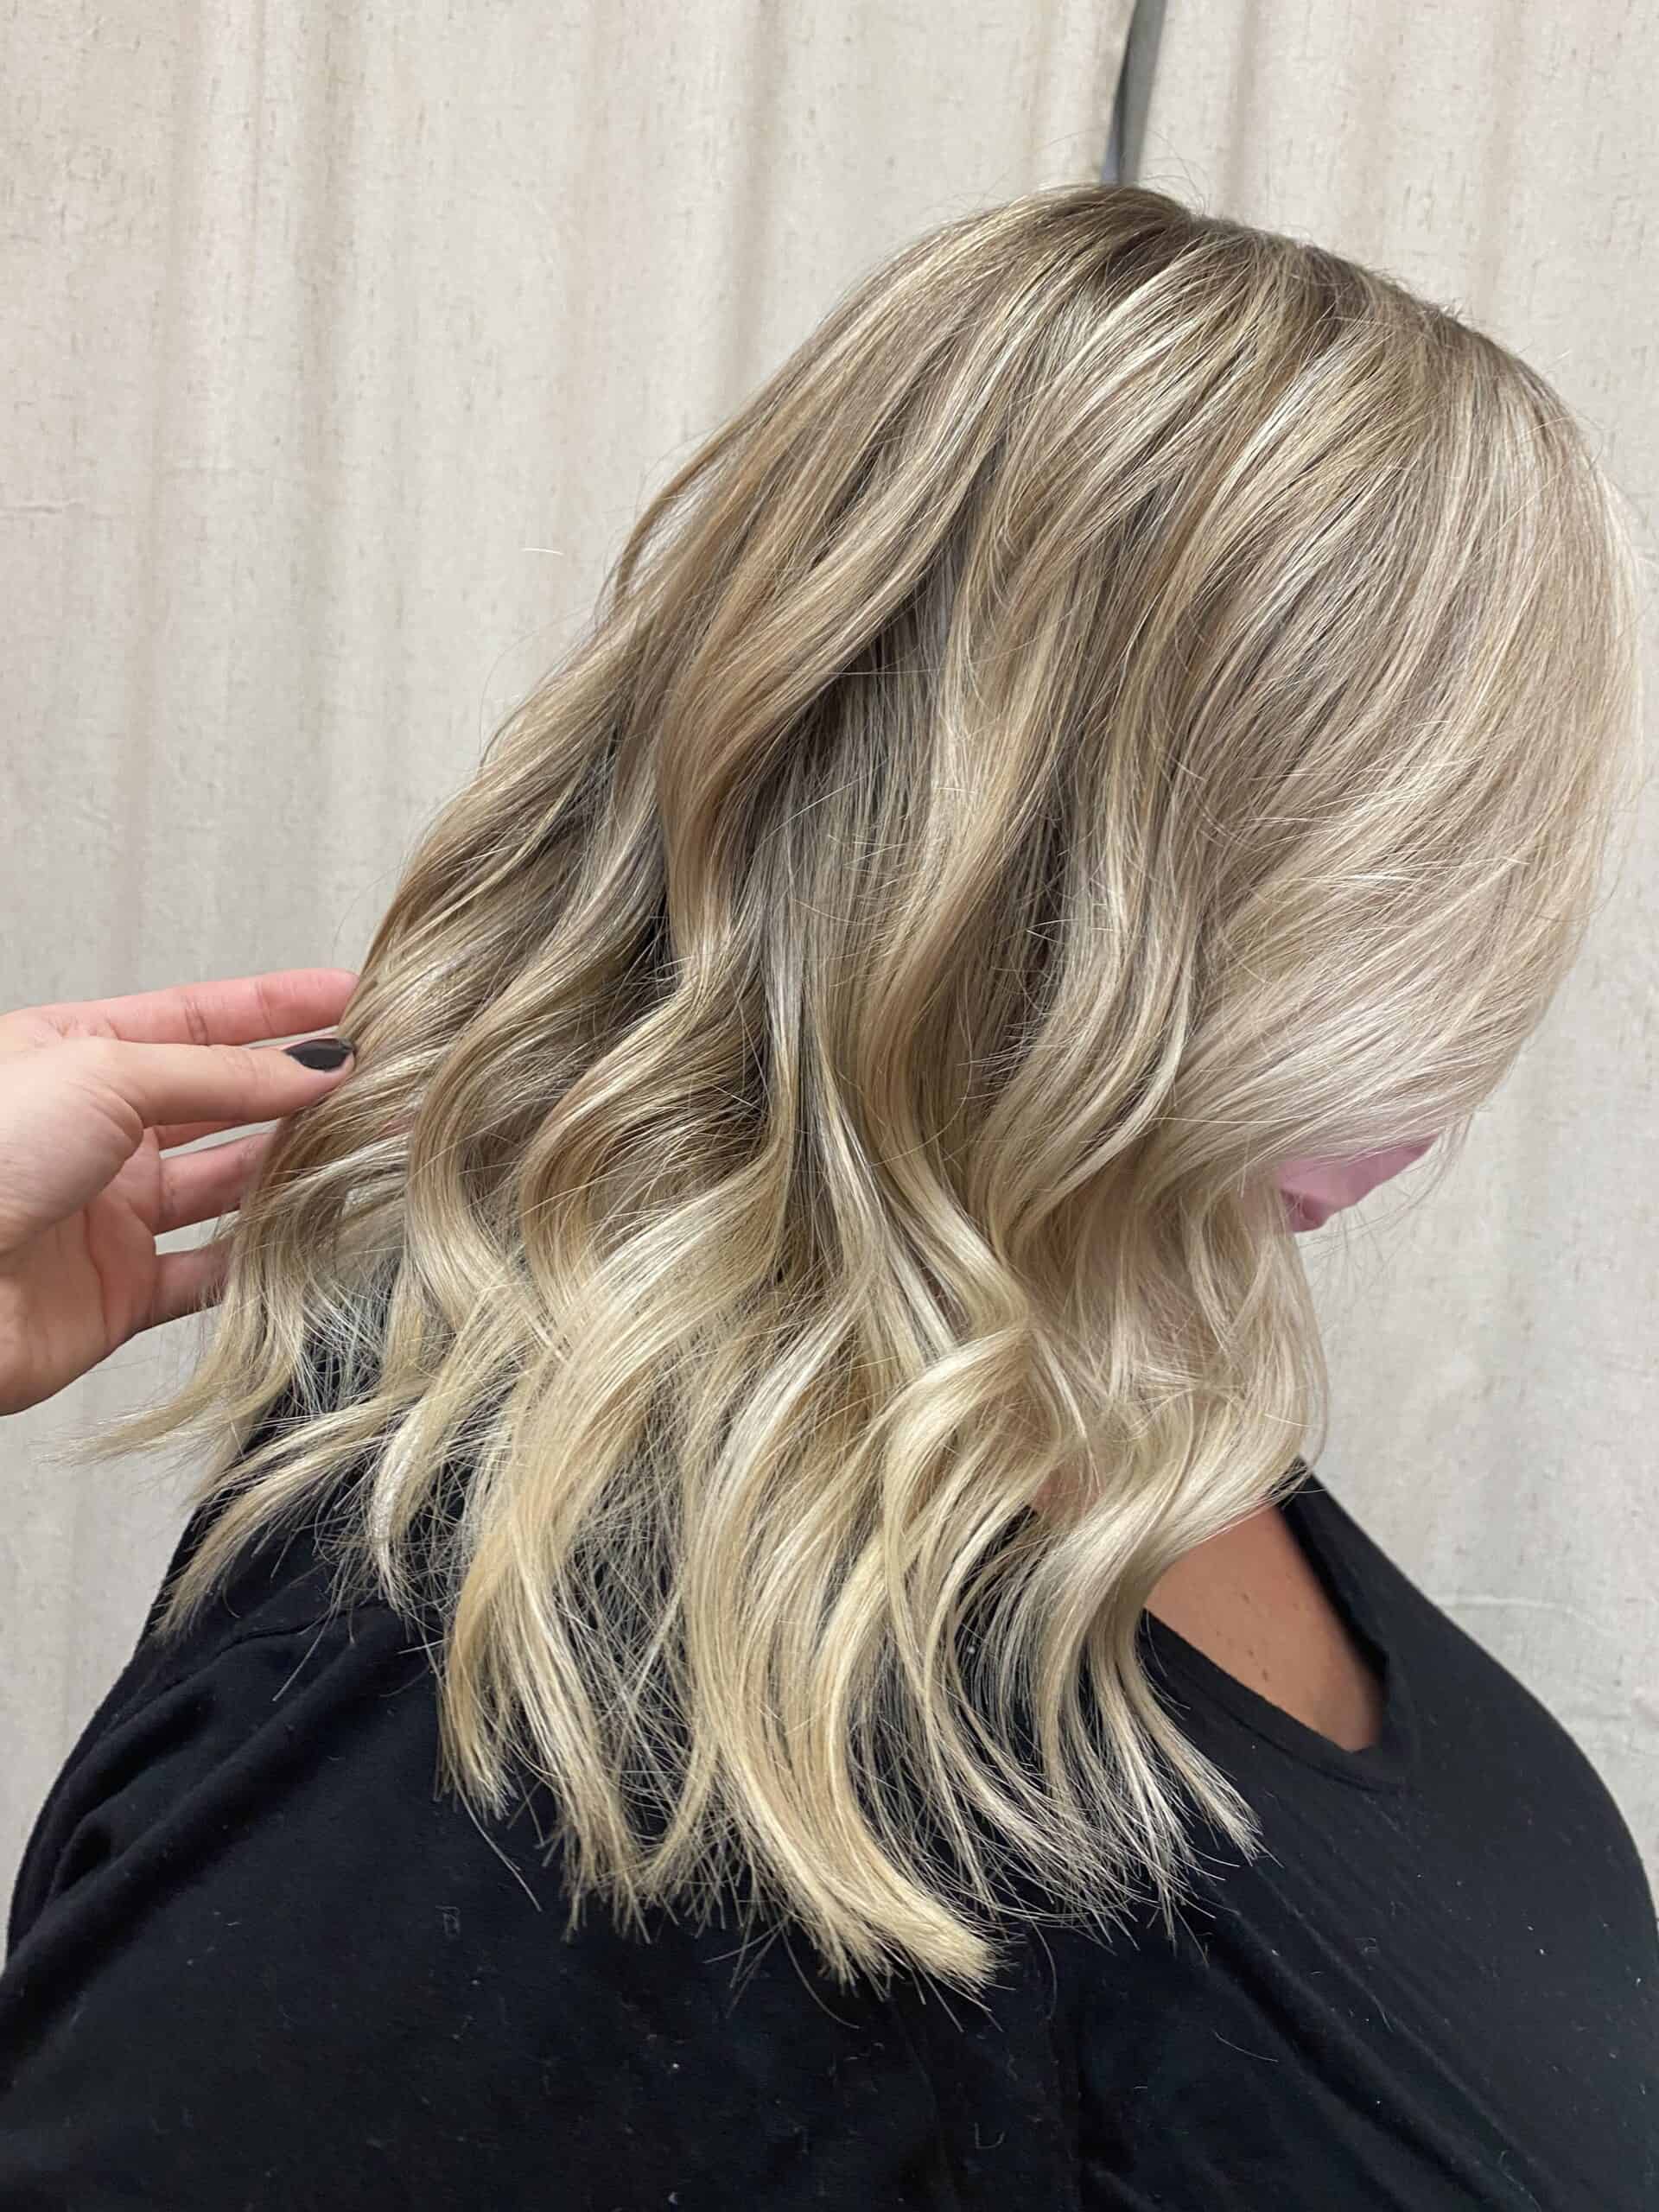
Reverse balayage is applied in larger panels, and its diagonal placement is key to avoid appearing chunky or too bold. This gives an overall more seamless look, while still adding some depth and dimension throughout the blonde. It also often still leaves the ends of the hair light, like a traditional balayage usually does (see image below).
How to blend dark roots into blonde hair
Throughout this tutorial, I’ll reference a previous blog post/Youtube video where I explain how to formulate and apply a root smudge with demi-permanent hair color. This is essentially the first step in a reverse balayage, so you’ll want to see that tutorial first. I’m not going to go over formulas in-depth here since they are covered well in that content.
***Since I’m sharing the products that I love to use with you guys, this page includes affiliate links to these products. If you take action and purchase a product through clicking one of my links, I’ll make some commission money from it at no extra cost to you. This enables me to be able to continue giving you awesome hair tips, so thanks! ***
What products & hair color to use
Below is a list of products and tools that I use in this tutorial. You can choose any color brand you’d like, but the key here is to never use any developer higher than 6 volume. 10 volume developer can permanently shift the hair, which would cause banding and affect your final result and grow-out.
- Leave-in Conditioner Spray
- 5 Volume Developer
- Pravana Hair Color
- Pravana Platinum Express tones
- Pravana Express tones
- New Growth Color Brush
- Balayage Brush
- Rat Tail Comb
- Black & Clear Color Bowls
- Black Gloves
Step 1: Start with a root smudge (shadow)
The first step in a reverse balayage is to create a root shadow. This blends the line of demarcation from your natural color into the blonde. I did this in a previous video about 2 months prior, so I did not need to do it in this color application today.
If you have not had a root smudge prior and you’re starting with a harsh line between your natural color and your blonde, you’ll want to do this at the same time as your reverse balayage. It is very simple, and you’ll just pull the color down in panels after you apply the root smudge.
In the video and blog post for this root smudge, I talk a lot about what type of color and formulas to use. I highly recommend watching that video to determine your own formula.
The formula that I used
You may choose to use only a darker color for your reverse balayage, or you can blend it into a slightly lighter color for an even more seamless blend. In the video today, I blend it into a lighter color.
For my root smudge 2 months ago, I used Pravana 6.22 with 5 volume developer. If you are doing the root smudge at the same time as the reverse balayage, feel free to use the same exact color to pull down as your reverse balayage.
I’m doing this 2 months later, so I’m going to lighten the formula slightly since the color has likely faded a bit. You can either use one level lighter (7.22) or add a lighter color into the formula. I added a lighter color into the formula, mainly because I had a 10.13 sitting in my cabinet that was getting old.
Like I mentioned in the previous tutorial, many formulas will work!
For the second, lighter color, I would go a level or two lighter than the dark formula that you’re using.
Always follow the manufacturer’s recommended ratios for mixing with developer. With Pravana, this is 1:1 1/2 (1 part color to 1 1/2 parts developer: 20 grams of 6.22 plus 30 grams of 5 volume developer).
- Root Smudge (2 months ago): Pravana 6.22
- Reverse Balayage Dark Color: 2/3 6.22 + 1/3 10.13
- Reverse Balayage Light Color: 2/3 Platinum Sand + 1/3 Pearl (Express tones)
Step 2: Apply the reverse balayage
Now that we’ve got our root smudge and formulas out of the way, it’s time to apply the color. I like doing this technique on wet hair because it’s easier to blend and comb through. But you can apply to dry hair, especially if you want a solid, deep color. Water will dilute the color slightly and give it a more translucent, blended tone.
I suggest starting in the back of your head because the finer hairs around your face have the tendency to suck color up, and could take too dark if it’s left on for longer.
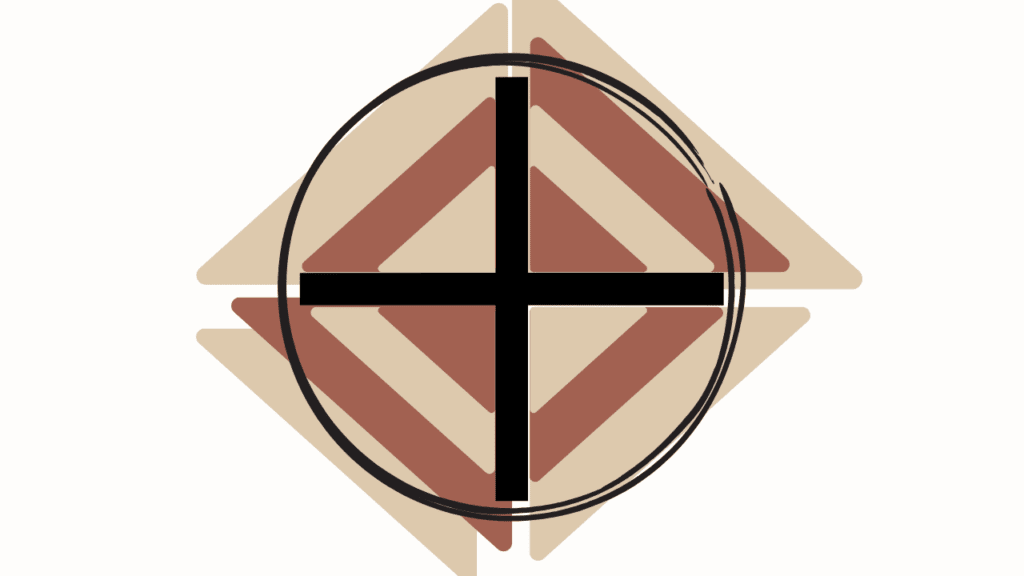
You’ll want to follow the graphic below for your color pattern. I recommend making the entire perimeter of your hair the lighter color to ensure the ends of the hair are the lightest.
Also, notice how the top section of each quadrant is catty-cornered, and we didn’t end with the same color at the top. This is because it would create a dark circle on the top of your head, and it isn’t really ideal.
So you’ll need to do a little planning, and you may only have one or two dark panels on some quadrants, with three or more in others.
You’ll panel the dark color in diagonal sections throughout your hair. If you’re using a lighter color for the ends, you’ll blend the colors together about halfway through. I suggest bringing the darker color lower in the back, and higher in the front.
Step 3: Apply the lighter color (if desired) & process
Now, if you choose to, you can also use the lighter color on your blonde sections that are not getting painted dark. Or, you may choose to leave those out entirely. If you want more contrast, I would leave them out.
For a more seamless look, you can apply the lighter color at the top of those sections and leave the ends out entirely. This is what I did.
I do want to suggest that if you are going to color the lighter panels at all, save them for the end so that the color doesn’t sit on for too long and take too dark.
Once you’re finished, you’ll process according to the last color applied. In my case, the express tones that I used for my lighter color only needs to process for 5-15 minutes. So I processed for 15 minutes and rinsed.
If you didn’t apply the lighter color, you may want to process for 20 minutes so the darker color has enough time to process entirely. But check what the brand you’re using recommends, as this varies from line to line.
Reverse Balayage Conclusion
Reverse Balayage is a hair coloring technique that adds depth and dimension by adding a darker color to blonde hair. It is commonly used on over-highlighted hair, hair that has a dark root with solid blonde ends, or when you’re looking to grow out blonde hair.
It is typically applied with a demi-permanent hair color. This is so it doesn’t lighten or shift the natural color, which would create a band in the hair as the color grows out if permanent color were used. Because of this, 6 volume or lower of developer needs to be used.
The steps for applying a reverse balayage are as follows:
- Step 1: Formulate & start with a root smudge
- Step 2: Apply the reverse balayage
- Step 3: Apply the lighter color (if desired) & process
My best recommendation for best results is to read this post all the way through, then watch the Youtube tutorial.
Please leave me any questions you have in the comments. And be sure to subscribe if you want to make everyday a good hair day!
share item
