

How To: St. Patrick’s Day Green & Gold Hair Color
If you know me well, then you know that I love to fully partake in anything and everything seasonal and holiday related. I’m super creative and love to make holiday inspired food–one year I even made a pumpkin pie with a turkey on the top made out of pie dough! And with being a hairstylist, naturally I like to do the same when it comes to creating hair color art. So with St. Patrick’s Day approaching, I felt inspired to create a St. Patty’s Day inspired green and gold hair color!
St. Patty’s Day Hair Art
The color I used for this look is a semi-permanent direct dye. This means that it contains no ammonia, and doesn’t even need to be mixed with developer. It is essentially a stain for the hair, and will fade out completely since it does not alter the middle layer of the hair, or the cortex.
If you’d like to watch this hair color process in action, watch my Youtube Video below.
Color Formula
Naturally when I went to mix the color, I realized that I was completely out of green direct dye. When I retired from working with clients, I gave away a lot of older hair color that wasn’t anything I used very often. Green isn’t exactly a common color I use on a daily basis!
But I did have Neon Yellow and multiple shades of blue, which I was able to create several lovely shades of green from! When I create colors from scratch like this, I typically mix different amounts of different colors together until I land on a shade I like. It’s also important to note that the current color of the hair plays a role in the outcome. Since my mannequin had gold hair, I needed to add more blue than yellow to the formula.
Below I’ll list the formulas that I used for this color, as well as the alternative color I would use if I had had it in stock.
If the color is available for sale on Amazon, I’ll link it below as well. Keep in mind that Amazon does not carry a full stock of professional hair colors. They only have a select few options that are being sold by third party sellers, since the professional line does not sell professional products through Amazon.
***Since I’m sharing the products that I love to use with you guys, this page includes affiliate links to these products. If you take action and purchase a product through clicking one of my links, I’ll make some commission money from it at no extra cost to you. This enables me to be able to continue giving you awesome hair tips, so thanks! ***
Dark Green (Root formula)
This formula is what I used on the root area of the hair. This color should always be the darkest color that you’re using to create a natural ombre effect. I also paneled this color throughout the hair.
**Mimicking** Pravana GREEN
- 21 grams of MYSTICAL MINT
- 21 grams of BLISSFUL BLUE
- 7 grams of BLUE
- 21 grams of NEON YELLOW
Light Green (Mid color formula)
This light green color was the mid color that I used. This means it’s in-between the root color and the highlight color. It’s used to marry the colors together and create a softer look with less contrast. If you wanted a higher contrast look, you could skip this color and use only the root formula and the highlight formula.
I also want to point out that I used black in this formula. Most black direct dyes contain blue undertones, so this was perfect for muting out the color and blueing out the yellow to make green. It’s important to start small when using black to make colors because it can be hard to reverse it.
- 5 grams of BLACK
- 15 grams of BLISSFUL BLUE
- 20 grams of NEON YELLOW
Gold/Yellow (Highlight formula)
This was the only color that I used straight out of the tube for this creation. I prefer neon yellow to regular yellow because the traditional yellow (in Pravana’s line) seems a little more like brassy color to me. The neon yellow is more obviously intentional.
20 grams of NEON YELLOW
Color application
To start, I applied the root formula all over the root area of the hair except for the front money piece which was left out for now.
Next, I began taking diagonal sections across the back of the mannequin. The next section that was taken was straight across, which creates a chevron type effect in the hair. (See my Youtube Video above for a visual example).
I used 4 different color variations throughout the hair:
- Panel 1: Light green
- Panel 2: Gold/yellow
- Panel 3: Light green to gold/yellow
- Panel 4: Dark green
Make sure that the top panel is the dark green. To make it easier, you can start at the top and work your way down in the order listed above.
When you get to the sides and front, work backwards from lightest to darkest with the money piece being gold/yellow, taking diagonal back sections. The last section should be your dark green formula.
You’ll let this color process for just 20 minutes before rinsing. If you have any left over hair color, you can actually keep it for another use. Since this color isn’t mixed with developer, it won’t oxidize and go bad. I used to save the color in a travel sized bottle for my clients to take home to keep up with their hair color at home as it fades.
How to rinse green hair color
When it’s time to rinse, make sure you use ICE COLD water. This is to stop the color from bleeding. Bleeding is when the darker color runs into the lighter colors and takes them over. Sometimes a little bleeding is impossible to avoid completely, and I even had a little bleeding myself in the video, but it was nothing major.
One way to help avoid as much bleeding as possible is to rinse and shampoo the colors separate from each other. I rinsed the money piece separately, and you can see that there wasn’t any bleeding. This is really hard to do though when you have a real live person, and also when the root color is darker. The color is likely to run down through the ends of the hair causing a little bleeding.
Typically I don’t worry too much about bleeding because often times it melts the colors together a little better. I prefer softer looks, and the bleeding helps to soften the harsh contrast.
After the initial shampoo, the hair should be washed as infrequently as possible to avoid premature fading.
Conclusion
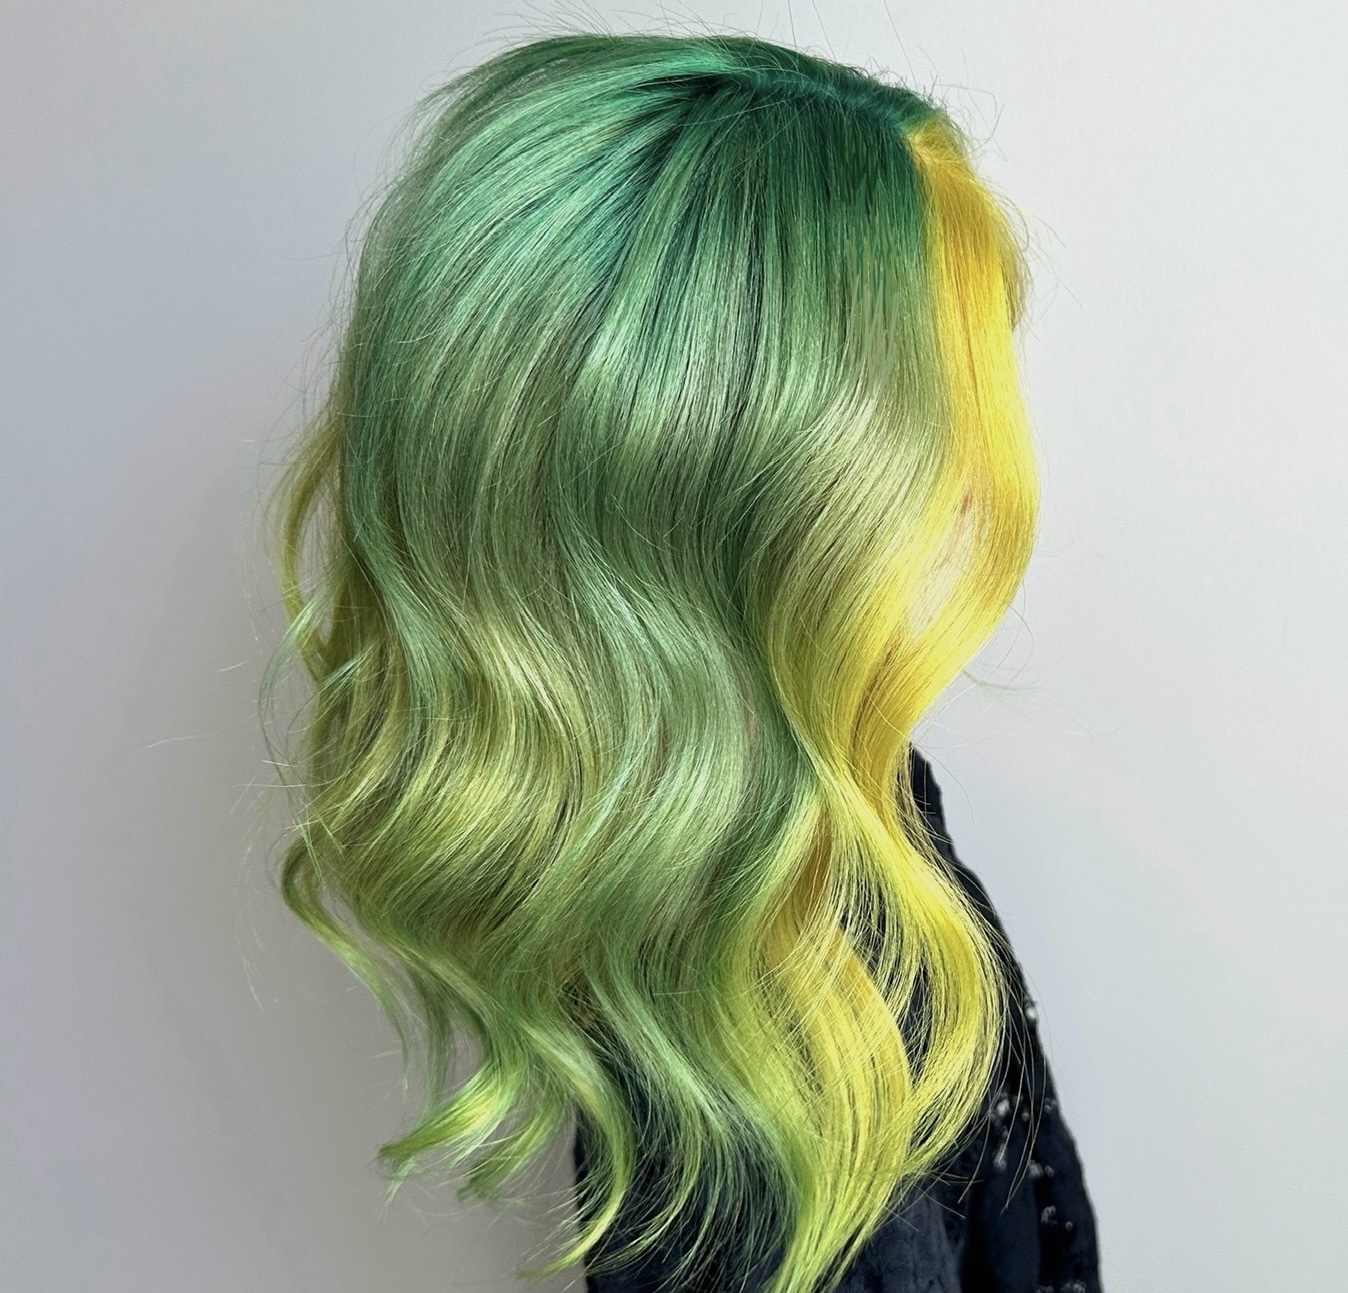
Since I love everything holiday and seasonal related, it’s only appropriate for me to create St. Patrick’s Day inspired green and gold hair color art! I did this on an old mannequin that I have, and it was honestly SO much fun to create.
To create this look you can use Pravana’s semi-permanent direct dye in:
- Neon yellow
- Neon green
- Green
Cover the root area with the dark green color (except for the money piece) and then panel the rest throughout the hair. They money piece is colored solid yellow.
After 20 minutes rinse in ice cold water to avoid the green from bleeding into the yellow.
If you’re interested in how to remove direct dye from the hair, make sure you subscribe and you’ll be notified when that is released, as I have plans to create that content in the future!
share item
