
How to Do a Keratin Treatment at Home: Step-by-Step Tutorial
If you’ve been thinking about doing a keratin treatment at home, you’re probably wondering if it’s something you can safely do yourself. While a professional application is always ideal, it is possible to achieve salon-quality results at home with the right products, technique, and a little patience.
As a licensed hairstylist with nearly 20 years of experience, I’ve performed countless keratin treatments on clients throughout my career. In this guide, I’ll walk you through exactly how I apply a professional keratin treatment from start to finish on myself, share the mistakes to avoid, and show you my results after the first wash on air-dried hair so you know exactly what to expect.
New to keratin treatments? Before getting started, I recommend reading my guide, Keratin Treatments: Everything You Need to Know Before Getting One, where I answer the most common questions and explain how keratin treatments work.
Choosing the Right Keratin Treatment
As I talked about in my keratin treatment explanation post, not all keratin treatments are created equally. Some contain formaldehyde, some don’t, and others are actually amino acid or straightening treatments, not true keratin treatments.
So before choosing your keratin treatment, decide what your goals are. Are you looking to straighten your hair, or simply reduce frizz? Are you wanting the least amount of harsh chemicals, or longer lasting results?
True keratin treatments do not straighten the hair, usually don’t contain formaldehyde, and only last for 3-5 months. Brazilian blowouts are amino acid treatments that will reduce the wave pattern more, and do contain formaldehyde. Other well-known smoothing treatments like Nanoplasty, Japanese Straightening, and relaxers may be a bit harsher on the hair and can permanently straighten it.
Professionally, I only recommend true keratin treatments because they’re the safest. I’ve seen hair become irreversibly damaged and brittle from some of these other, longer-term smoothing treatments. I’ll link my favorite brand below that is formaldehyde-free and has given me beautiful, healthy results time and time again on myself as well as my clients.
What Accessories You’ll Need to do a DIY Keratin Treatment
***Since I’m sharing the products that I love to use with you guys, this page includes affiliate links to these products. If you take action and purchase a product by clicking one of my links, I’ll make some commission money from it at no extra cost to you. This enables me to be able to continue giving you awesome hair tips, so thanks! ***
- Gloves
- Color Bowl
- Color Brush
- Color Scale
- Clips
- Heat Resistant Comb
- Rat Tail (Heat-Resistant) Comb
- Round Boar Bristle Brush
- Vented Heat Resistant Blow Dry Brush
- Blow Dryer
- Flat Iron
How to Do a Keratin Treatment at Home
I filmed the entire process from start to finish so you can follow along step by step. Watch the tutorial below, then continue reading for the tips, mistakes to avoid, and my results after the first wash.
My Biggest Tips During Application
- Don’t oversaturate!
- Don’t rush the flat ironing.
- Avoid wetting or kinking the hair for 72 hours.
DIY Keratin Treatment Before and After 72 Hours
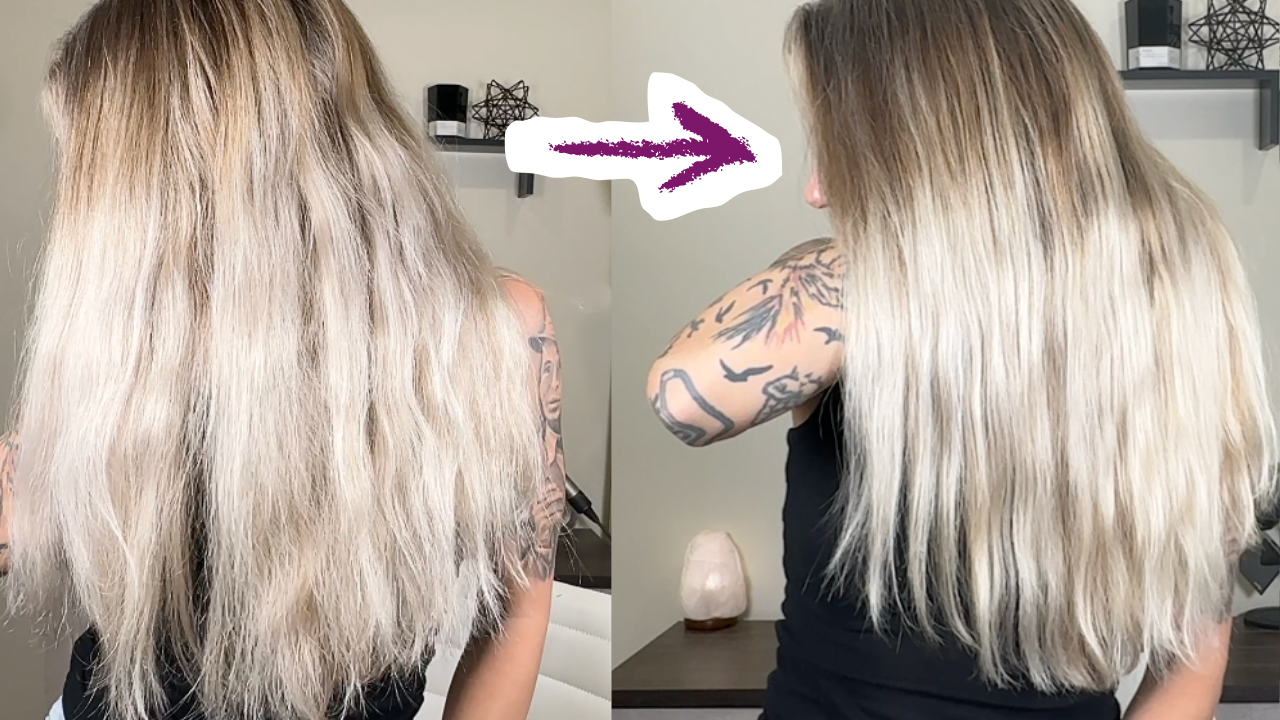
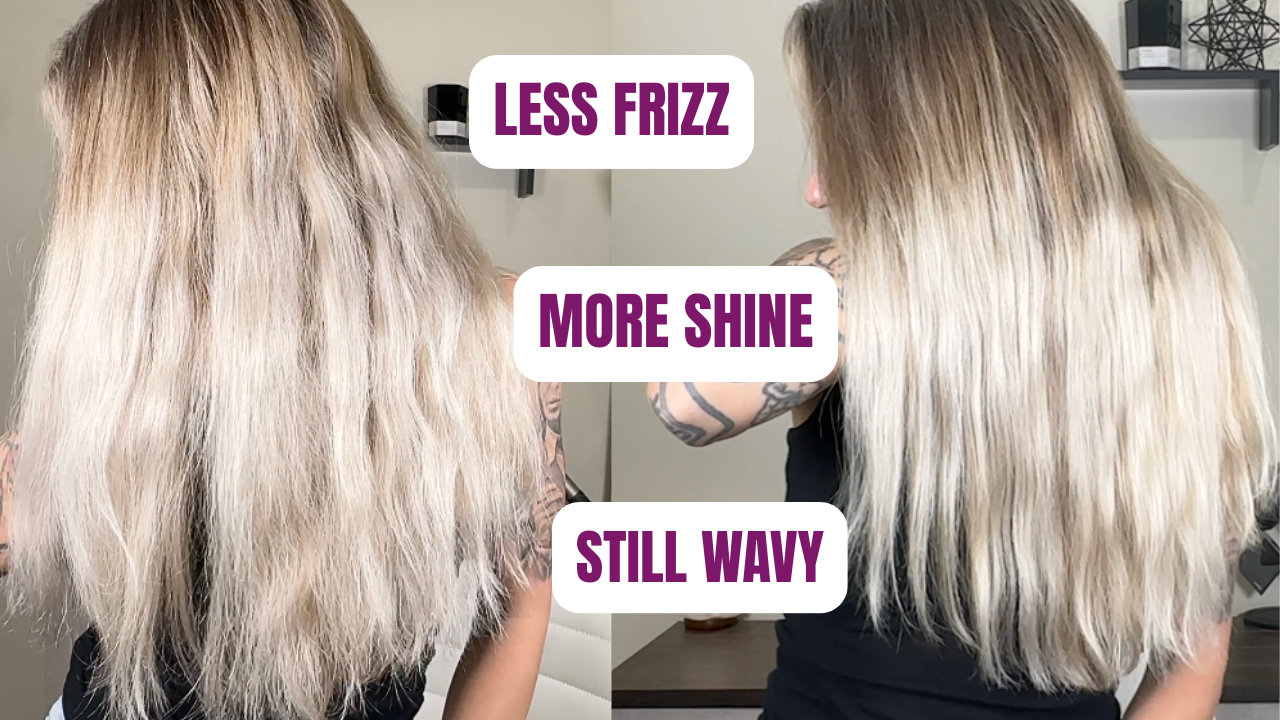
Above you can see what my hair naturally air-dried like before my DIY keratin treatment, as well as how it naturally dried after. As you can see, my natural waves are still intact; however, the frizz is gone, and it’s incredibly shiny.
While the volume is reduced somewhat, my hair is much more manageable and wearable in its natural state without any heat styling or effort.
Common DIY Keratin Treatment Mistakes
- Oversaturation: Oversaturating the hair is the most common mistake made when applying a keratin treatment. Keratin isn’t like hair color, and when too much product is applied, it can build up on the hair and make it feel stiff and gunky. Follow the tips in the tutorial to ensure you don’t oversaturate the hair
- Improper Flat Ironing: Since flat ironing is what binds the keratin to the hair, this is one of the most important aspects of the application process. The temperature should be between 360°-380°, small (1/8″) subsections should be taken, and the iron should be passed no less than 7 and no more than 12 times over the hair.
- The Hair Gets Wet or Kinked Before 72 Hours: It takes 48-72 hours for the keratin to bind to the hair fully. Because of this, the hair should not get wet or kinked before the 72-hour mark. This means not putting it behind your ears, in a ponytail, sweating a ton, or washing it sooner. If it does, the hair should be dried and flat ironed as soon as possible.
- Too Frequent Treatments: Keratin treatments should only be done once every 3-5 months. If done too often, keratin can build up on the hair and actually cause breakage. I usually recommend having only 1-3 treatments per year, 4 if the hair is extremely frizzy and unmanageable naturally.
Aftercare: How to Make a Keratin Treatment Last Longer
The way that you care for your hair after doing your keratin treatment is crucial to the longevity of the treatment. Similar to hair color, it won’t last as long if you aren’t mindful in your routine.
To ensure your keratin treatment lasts for the usual 3-5 months, follow the recommended aftercare precautions:
- Sulfate-Free Shampoo & Conditioner: Sulfates are the sudsy part in shampoo. And while they help emulsify, they can be pretty stripping and pull keratin (and color) right out of your hair.
- Keratin Care Products: Aside from sulfate-free shampoos, for best results you’ll want to opt for products designed to lock the keratin into your hair. Color care and smoothing products are designed to keep the cuticle sealed, which helps to slow the keratin from exiting your hair.
- Avoid Chlorine & Salt Water: Sodium chloride breaks down the keratin in the treatment and aggravates the cuticle, causing the keratin treatment to fade drastically. It’s best to avoid the pool and ocean after getting a keratin treatment, but if that’s unavoidable, soak your hair in conditioner (without rinsing it out) before getting in. Your hair will absorb the conditioner and less of the sodium chloride.
- Keep Hair Healthy: Damaged hair has an open cuticle, which makes it easy for color, moisture, and keratin to exit the hair. The healthier your hair is, the better it holds onto color, hydration, and keratin. Wash hair less frequently, reduce heat styling, perform deep conditioning treatments regularly, and use leave-in moisturizing products to promote healthy hair.
Recommended Aftercare Products:
- Aftercare Kit
- Color Care Keratin Shampoo & Conditioner
- Purple Keratin Shampoo & Conditioner (for blondes)
- Volumizing Keratin Shampoo & Conditioner
- Deep Conditioner
- Leave-In Spray
- Blow Dry Cream
Conclusion
A DIY keratin treatment can be a great way to reduce frizz, improve manageability, and achieve smoother, shinier hair at home as long as you use the right products and follow the application process carefully. Taking your time during the application and following the aftercare routine will help you get the most longevity possible.
If you’re still deciding whether a keratin treatment is right for you, or you want to learn more about how they work, their benefits, formaldehyde, and common misconceptions, be sure to read my guide, Keratin Treatments: Everything You Need to Know Before Getting One. It covers everything you should know before deciding if a keratin treatment is the right choice for your hair.
share item

